Social Icons

Pages

14 April 2011

Membuat Partisi Pada Windows 7

Mempartisi harddisk merupakan hal yang lebih baik dilakukan pada sebuah computer. Dengan adanya beberapa partisi harddisk, maka kita akan bisa mengatur letak atau lokasi drive untuk system dan drive untuk penyimpanan data. Dengan demikian jika suatu saat Windows mengalami crash atau rusak, dan perlu untuk diinstall ulang, maka data yang disimpan akan tetap terjamin keamanannya. Selain hal tersebut, dengan mempartisi harddisk kita akan lebih mudah dan lebih cepat untuk melakukan defragmentasi, daripada harddisk yang tanpa partisi akan lebih memakan waktu yang cukup lama. Partisi ini bisa juga bermanfaat untuk mencegah atau meminimalisasi adanya bad sector pada harddisk. Oleh karenanya saya tetap menyarankan agar harddisk yang hanya terdapat 1 partisi, lebih baik di partisi menjadi beberapa partisi.

Untuk menambahkan partisi pada Windows 7, kamu tidak perlu susah-susah untuk install aplikasi, seperti Partition Magic, Paragon, atau Acronis. Kamu bisa menggunakan Disk Management yang terdapat pada Computer management.

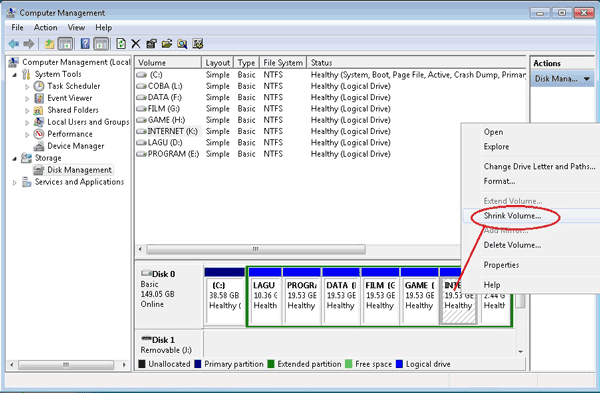
  1. Klik Star Menu, Klik kanan computer > pilih manage

  2. Pada jendela “computer management”, pilih storage kemudian pilih disk management

  3. Pada jendela sebelah kanan terlihat jumlah partisi yang telah ada. Kemuian klik kanan pada harddisk yang mau dipartisi. ( Kalau baru terdapat 1 partisi misal C: klik kanan pada partisi C:, kalau sudah ada beberapa partisi “seperti gambar dibawah” dan mau di partisi lagi maka klik kanan pada drive yang mau di partisi lagi ) kemudian pilih Shrink Volume

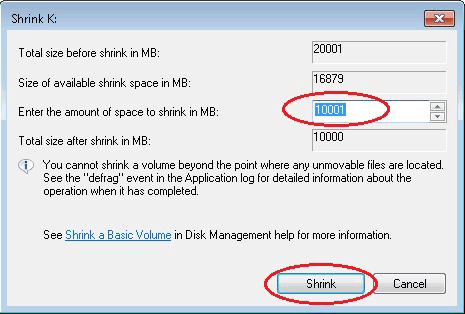
  4. Muncul “querying shrink space” dan tunggu sebentar.

  5. Muncul jendela shrink. Disini shobat diminta untuk menentukan volume partisi yang mau dibuat. Isikan saja berapa volume sesuai dengan yang shobat rencanakan. Setelah itu klik Shrink


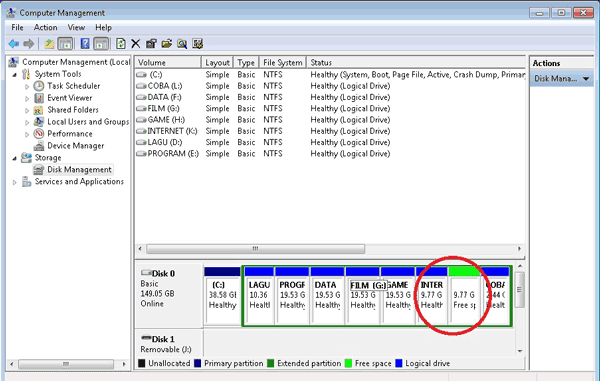
  6. Maka akan muncullah partisi baru yang masih belum terformat atau free space ( lihat partisi dengan Warna hijau ). Sampai disini partisi baru masih belum bisa digunakan.


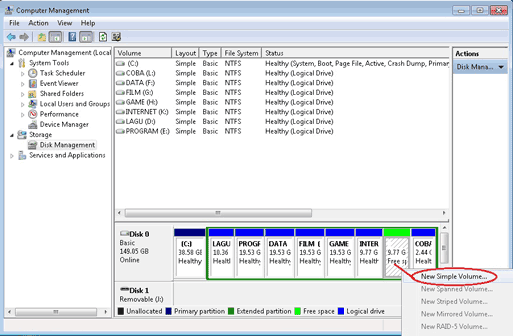
  7. Untuk memformat partisi agar bisa digunakan, klik kanan pada “free space” tadi kemudian pilih new simple volume


  8. Muncul New simple volume wizard > klik next

  9. Muncul jendela specify volume size > klik next lagi

  10. Muncul jendela assign drive letter or path > klik next lagi

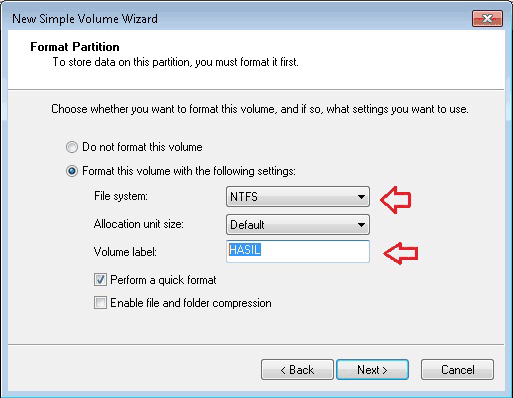
  11. Muncul jendela format partition. Pada file system pilih saja NTFS, kemudian pada volume label > isikan “nama label drive partisi anda”, kemudian klik next

  12. muncul jendela completing the new simple volume wizard. Sebelum klik finish lihat dulu informasi yang tertera. Kalau belum sesuai dengan keinginan shobat, klik back, kalau sudah sesuai silahkan klik finish

  13. Maka partisi harddisk telah selesai dan siap untuk dipergunakan

Untuk mengecek partisi yang baru, cobalah buka windows explorer. Bila prosesnya telah benar maka akan muncul partisi baru sesuai dengan label yang telah shobat buat tadi.


Sumber : rahmabasel.blogspot.com
Read more

09 April 2011

Menghilangkan Objek Dengan Photoshop CS5

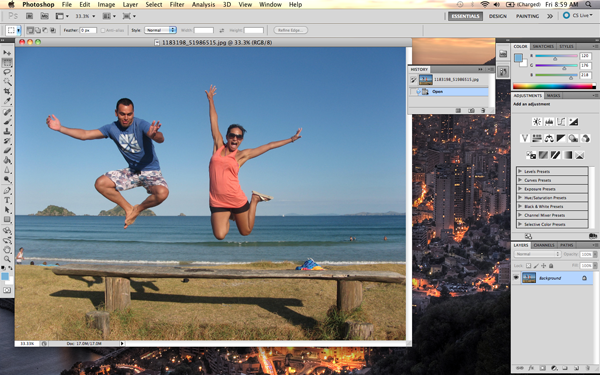
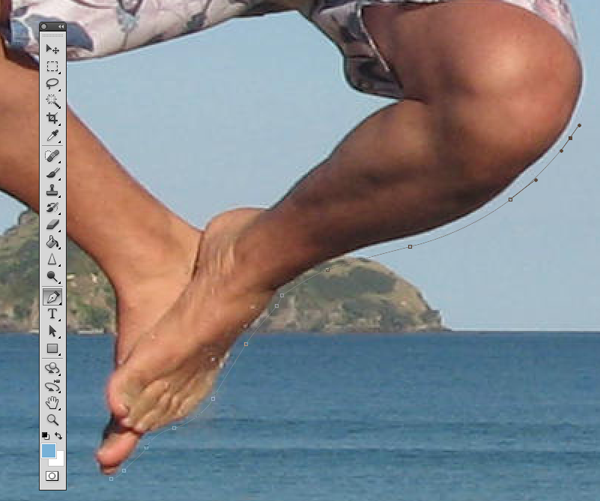
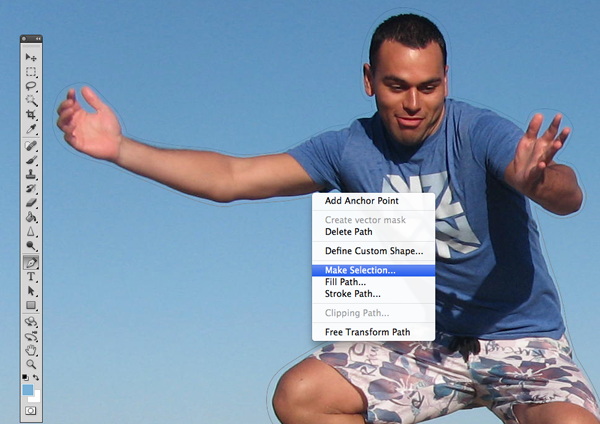
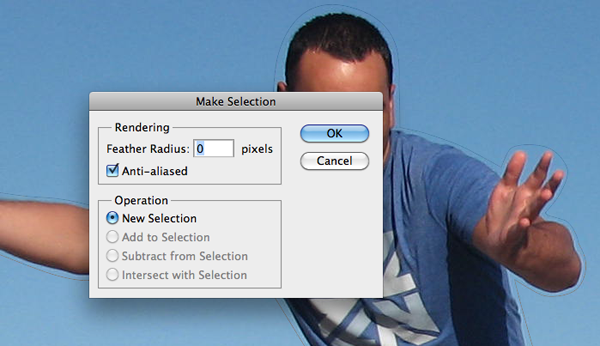
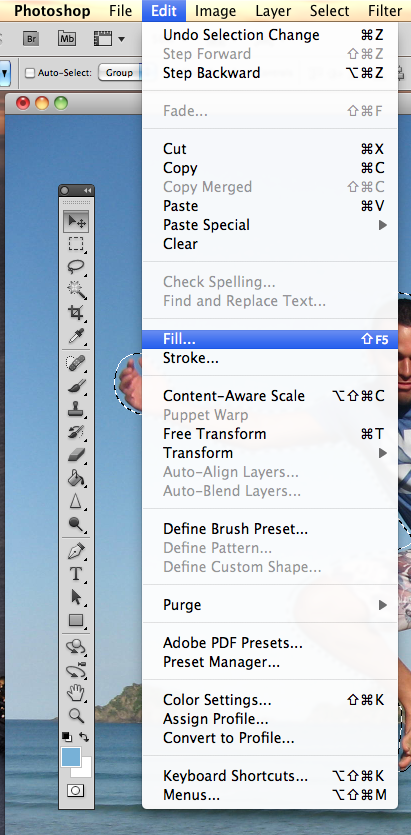
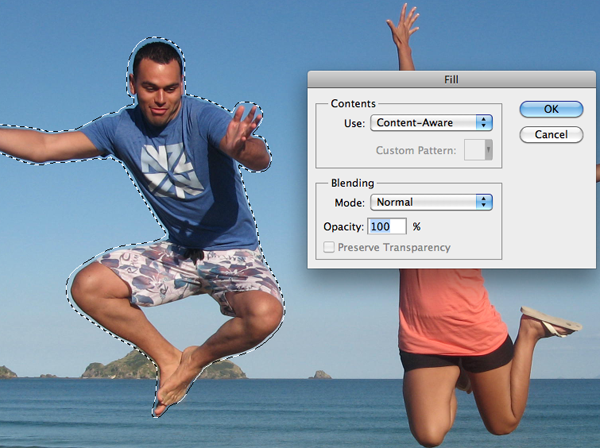
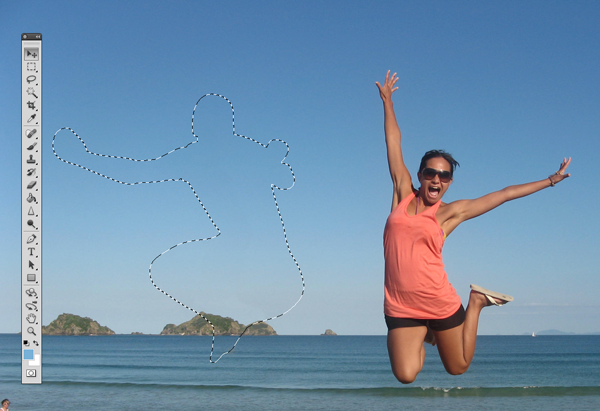
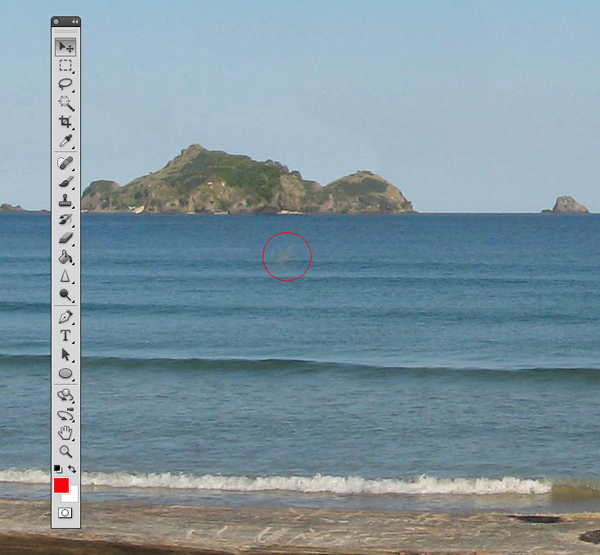
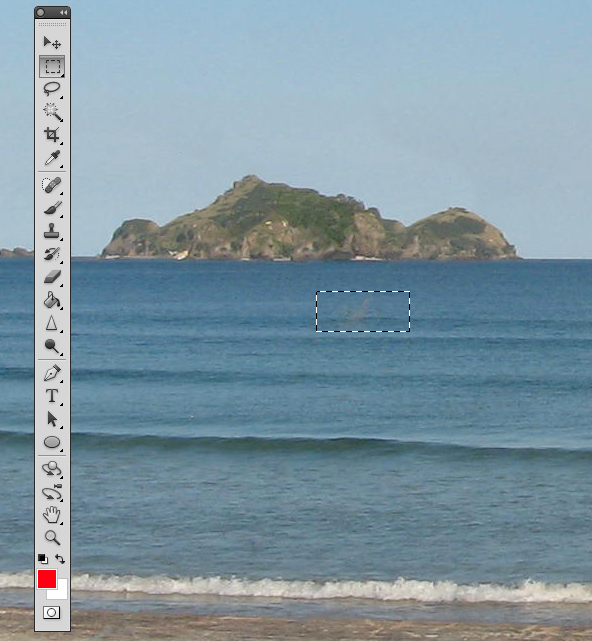
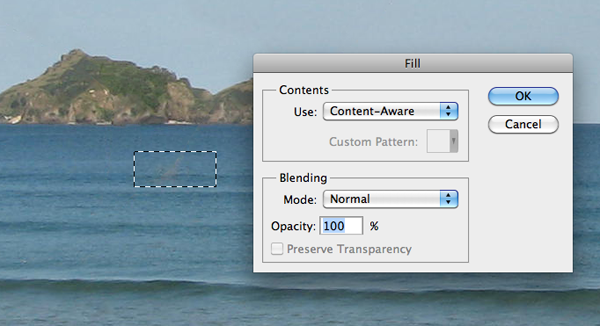
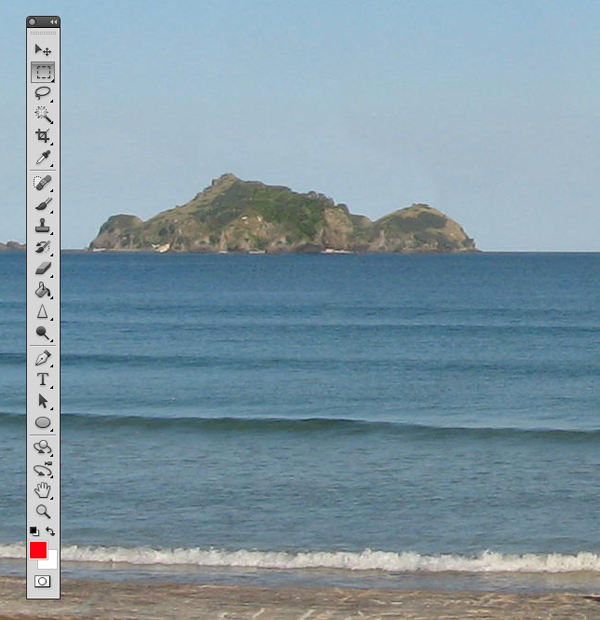
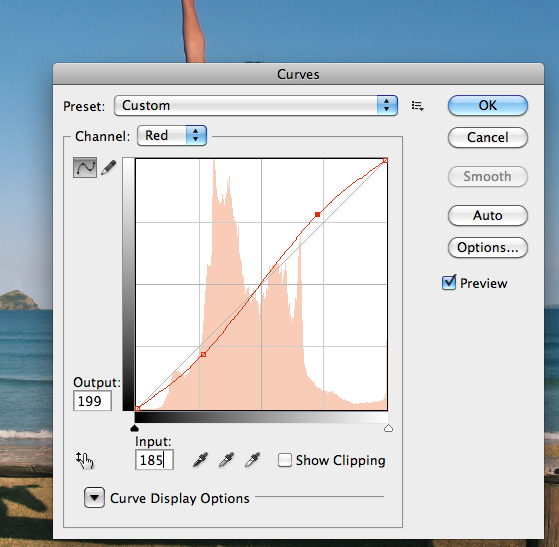
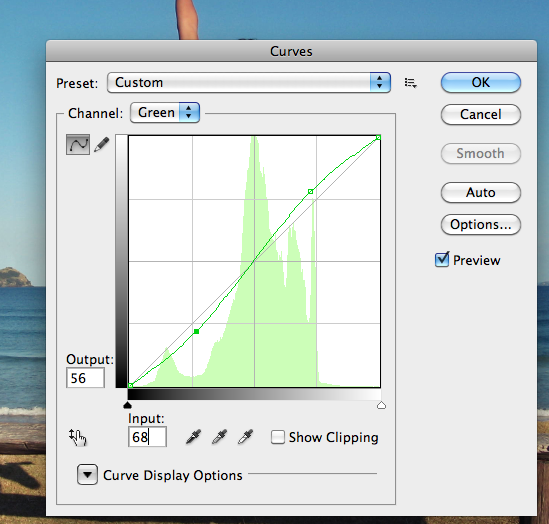
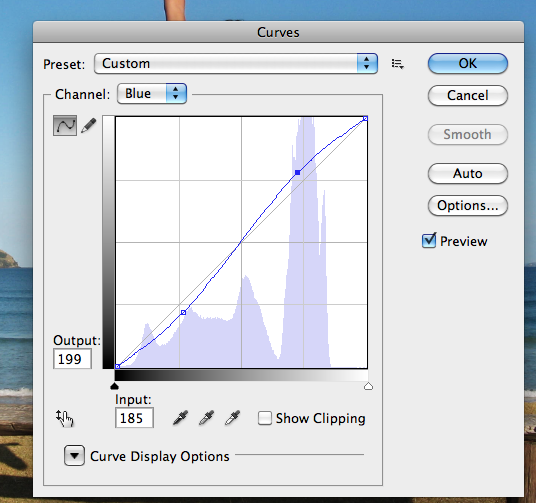
Adobe Photoshop CS5 memiliki fitur baru untuk mempermudah dan mempercepat tahap2 pengeditan photo kita, salah satu fitur yang akan kita pakai saat ini disebut Content Aware. Fitur ini memungkinkan kita untuk mempermudah bagian yang kita seleksi untuk mengisinya dengan bagian2 disekitarnya, sehingga terlihat seperti dalam satu bagian seperti aslinya. Dalam percobaan kali ini kita akan mencoba menghapus seseorang dari foto dalam waktu kurang dari 5 menit. Ini dia contoh gambar asli dan editannya :


SebelumSesudah

Berikut langkah-langkahnya :

Step 1
Using the content aware tool on different images produces different results. An image with a gradient background such as the sky in this image is quite tricky to work with. Open beach.jpg in Photoshop.


Step 2
We are extracting the person on the left from this photo. Using the Pen Tool, (P) Begin by making a path around the subject. The nice thing about using content aware is that you do not have to be exact when making a selection. In fact, do your best not to cut too close to the subject.


Notice in the image below how far I am drawing the path from the subject. Try to keep this distance all the way around. If you go too close, Content Aware will take pixels from the subject. If you cut too far it will take pixels from the woman on the right.


Step 3
Once you complete the path around the subject, turn it into a selection. This can be done by right clicking on the path and selecting Make Selection.


A dialog box will pop-up, make sure the feathering is set to 0px. Leave all other options as they are. Click OK.


Step 4
Now we have an active selection around our subject. In this step we will make the subject disappear from the image using Content Aware Fill. To do this, go to Edit > Fill.


A dialog box will pop-up, make sure the Content Aware option is selected. Blending mode is set to normal and the opacity is at 100%. Hit OK.


You can cancel the selection at any time by making another selection or just clicking anywhere else on the page with any selection tool.


Step 5
In this step we will remove some of the other artifacts in the image using the same process. The content aware tool did miss a spot where the subject’s foot originally was. To do this, draw a rectangle around the area using the rectangle selection tool. And use the content aware fill as we have done in the previous steps.


Now let’s remove the people towards the right of the image. Create a rectangle selection around them and use the steps we just demonstrated to remove them.


Step 6 (Optional)
Using the Crop Tool (C) lets crop the image so that the focus is drawn to the woman jumping. To do this, just crop out an area of the image that you would like to keep. Beware of the shadow that is left behind from the person that we have removed. You can use the Content Aware feature to remove this shadow but I have decided to crop it out altogether.


Click the checkmark at the top to keep this area. Photoshop will discard the content that is outside of your crop area.


Step 7 (Optional)
In this step we will enhance the photo by giving it a more vibrant look. The colors currently appear somewhat dull. There are many ways to accomplish this but we will use Color Curves. To do this, go to Image > Adjustments > Curves, (Cmd + M). A dialog box will pop-up and we will select each of the channels, R, G, B and work on them separately. Select the Red channel from the dropdown menu.

We are going to make two points on the graph. One in the bottom of the top right square, and one in the top of the bottom left square.


Once you have made these points, make sure you enter the values for each. For the top right point the Output value is 199, and the input value is 185. For the bottom point the values are 56 and 68, respectively. You can play around with these setting and adjust them to whatever you feel is appropriate. Repeat this for each of the colors, Green and Blue.


Final Image
Your image should now look something like the one seen below. As you can see, we have removed the man on her left with very little effort using Photoshop CS5′s new Content Aware Feature.


Sumber : psd.tutsplus.com
Read more

04 April 2011

Lupa Password Administrator Windows

Berikut ini adalah cara alternatif untuk mengatasi kalau sobat lupa password administrator, sebelum menggunakan jalan terakhir yaitu menginstal ulang windowsnya, caranya yaitu dengan me-reset password menggunakan tool berikut.

• Silakan download softwarenya dalam format image (ISO), ukurannya sekitar 3,6 MB, (suport windows xp dan vista juga windows 7)
• Kemudian (burn) ke CDR blank menggunakan software burning seperti nero, ImgBurn.dll. Gunakan pilihan Burn image to disc (nero).
• Booting komputer menggunakan CD yang telah kita buat (set komputer (bios)agar first bootnya ke CD/DVD drive).

1. Tampilan pertama seperti ini. Lalu tekan enter, tunggu beberapa saat


2. Pilih Partisi dimana windows terinstall, atau langsung Tekan enter


3. Pilih windows registry directory, atau langsung Tekan enter


4. Tekan enter ( Pilihan : Pasword reset)


5. Tekan enter (Edit user data and password)


6. Tekan enter (pilihan : administrator)


7. Ketik 1 (angka satu) kemudian tekan enter (clear/blank password)


8. Ketik ! (tanda seru) kemudian tekan enter (untuk keluar)


9. Ketik q kemudian tekan enter (untuk keluar)


10. Ketik y kemudian tekan enter untuk menyimpan


11. Ketik n kemudian tekan enter untuk keluar


12. Keluarkan CD, tekan tombol Ctrl + Alt + Del Untuk Reboot komputer


Sekarang account Administrator saat ini sudah tidak memakai password. Semoga Bermanfaat.


Sumber : www.squidoo.com
Read more